*.styをクラウドサービスで共有する(macOS)
はじめに
tex文書作成で野良 *.styを読み込みたいときは,コンパイルしたい *.texと同じディレクトリに *.styを置くのが手っ取り早い方法です。 しかし,これでは*.styの場所がバラバラになってしまうので纏めておきたいです。 さらに,まとめた *.styをDropboxなどのクラウドサービスで,複数のPC・macで共有できると便利です。
数年前に一度設定をしたのですが,思い出せなくて手間取ったので,今度は忘れないように文字に残しておきます。
けっきょくは,GUIのアプリケーションに環境変数を渡すということをやるらしいのですが, OS X 10.9(Mavericks)以前と以後では,設定方法が違うので注意してください。
自分の環境
Mac mini (M1, 2020),macOS 12.2.1 (Monterey),emacs 26.3
emacsをIDEのようにして使っていますが,TeXShopなどでも同じだと思います。 デフォルトシェルをbashにしているので,違う人は同じようにできないかもしれません。 intel Macでも同じように設定ができています。
やること
/Users/myname/.bash_profile の適当な場所に,*.styの場所を書いた一文を追加します。 Dropboxなどで共有すると,すべてのPC・macで使えて便利です。
# *.sty の場所
export TEXINPUTS=/Users/myname/Dropbox/tex/sty//:
/Users/myname/.osx-env-sync.sh を作成します。名前は適当でいいです。
grep export $HOME/.bash_profile | while IFS=' =' read ignoreexport envvar ignorevalue; do
  launchctl setenv ${envvar} ${!envvar}
done
/Users/myname/Library/LaunchAgents/osx-env-sync.plist を作成します。
<?xml version="1.0" encoding="UTF-8"?>
<!DOCTYPE plist PUBLIC "-//Apple//DTD PLIST 1.0//EN" "http://www.apple.com/DTDs/PropertyList-1.0.dtd">
<plist version="1.0">
<dict>
  <key>Label</key>
  <!-- ↓ここ↓ -->
  <string>osx-env-sync</string>
  <key>ProgramArguments</key>
  <array>
    <string>bash</string>
    <string>-l</string>
    <string>-c</string>
    <!-- ↓ここ↓ -->
    <string>
      $HOME/.osx-env-sync.sh
    </string>
  </array>
  <key>RunAtLoad</key>
  <true/>
</dict>
</plist>
最後に
OSの再起動か再ログインをすれば *.styを読み込んでくれるはずです。 うまくいかない人は,ファイルの実行権限などを確認してみてください。
参考文献
参考というか,丸パクリですね。 racooma.com
tikzlingsパッケージで作るフレームの紹介
はじめに
いささか狂気を感じる tikzlingsパッケージを用いて作成したフレームを紹介します。
以下のページを参考というか,ほぼ丸パクリして作りました。
tikzlingsパッケージのマニュアルを参照することで,イカしたフレームが少しの変更で作れると思います。
フレームたち
\begin{animal1}
  \sampleex
\end{animal1}
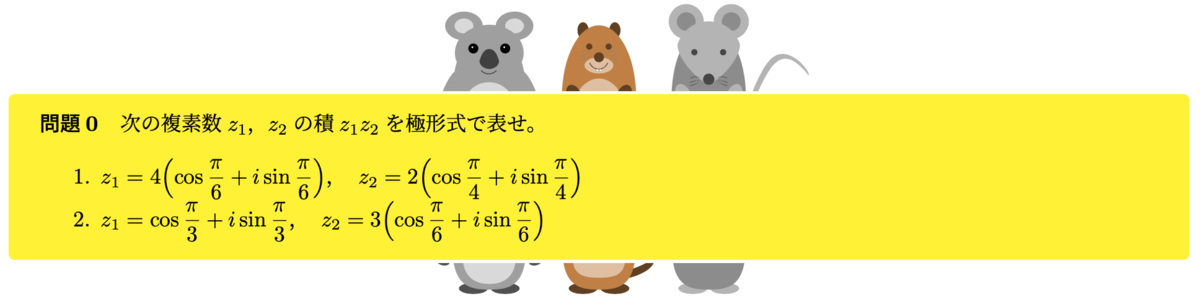
\begin{animal2}
  \sampleex
\end{animal2}

\begin{animal3}
  \sampleex
\end{animal3}
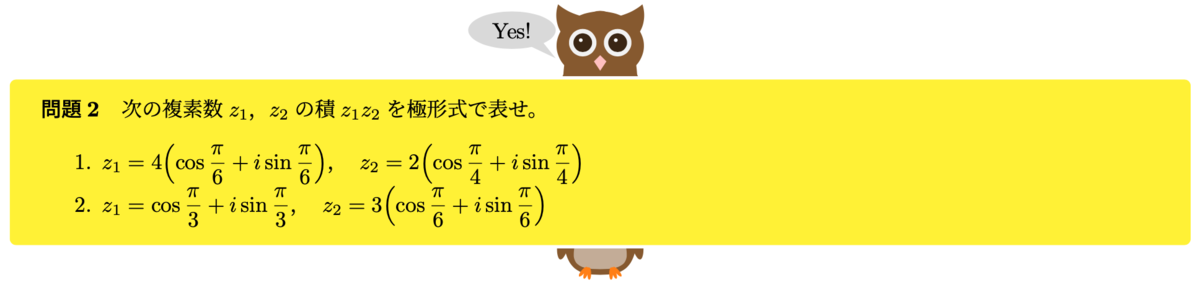
\begin{animal4}
  \sampleex
\end{animal4}
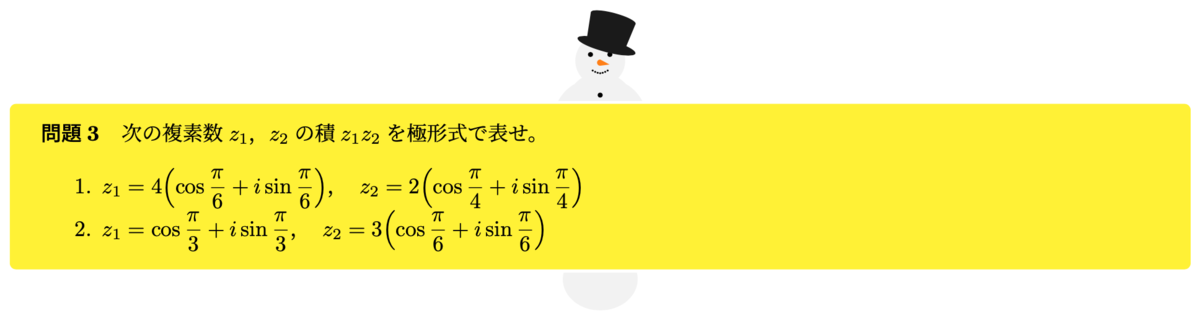
\begin{animal5}
  \sampleex
\end{animal5}
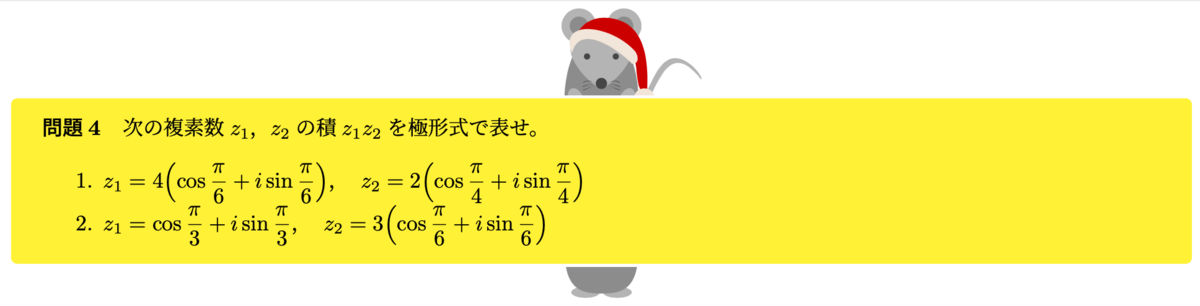
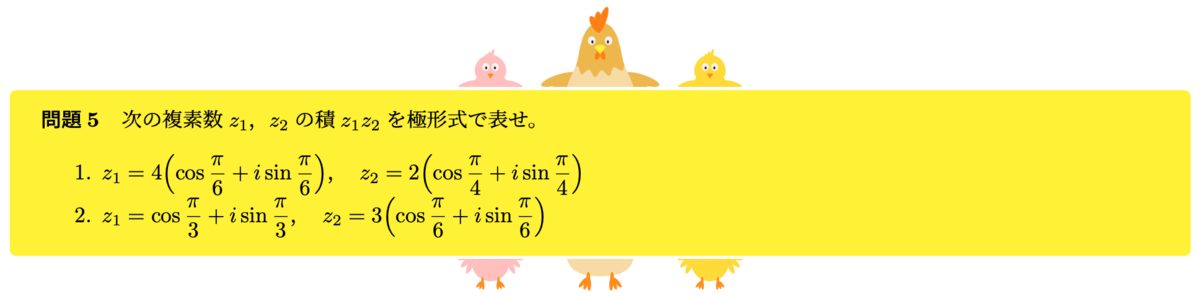
\begin{animal6}
  \sampleex
\end{animal6}
プリアンブルでの記述
問題番号のカウント
\newcounter{mynumcnt}
\setcounter{mynumcnt}{0}% カウントキャンセル
\newcommand{\mynum}{\themynumcnt\refstepcounter{mynumcnt}}
フレームで囲む問題
\newcommand{\sampleex}{%
\textbf{問題\mynum}\quad
次の複素数$z_1$,$z_2$の積$z_1 z_2$を極形式で表せ。
  \begin{enumerate}
  \item $z_1=4\qty(\cos{\dfrac{\pi}{6}}+i\sin{\dfrac{\pi}{6}})$,
    \quad $z_2=2\qty(\cos{\dfrac{\pi}{4}}+i\sin{\dfrac{\pi}{4}})$
  \item $z_1=\cos{\dfrac{\pi}{3}}+i\sin{\dfrac{\pi}{3}}$,
    \quad $z_2=3\qty(\cos{\dfrac{\pi}{6}}+i\sin{\dfrac{\pi}{6}})$
  \end{enumerate}
}
フレーム
\newtcolorbox{animal1}[1][]{%
  enhanced,
  before skip=30ex,after skip=10ex,
  colback=yellow,frame hidden,
  overlay={%
    \begin{scope}
      \clip (frame.north west) -- (frame.north east) -- ++(0,+10ex) -- ++(-\linewidth,0) -- cycle;
      \marmot[shift={([yshift=-7ex]frame.north)},whiskers,teeth]
      \koala[shift={([yshift=-7ex,xshift=-5em]frame.north)}]
      \mouse[shift={([yshift=-7ex,xshift=5em]frame.north)}]
    \end{scope}
    %
    \begin{scope}
      \clip (frame.south west) -- (frame.south east) -- ++(0,-10ex) -- ++(-\linewidth,0) -- cycle;
      \marmot[shift={([yshift=-4ex]frame.south)},whiskers,teeth]
      \koala[shift={([yshift=-4ex,xshift=-5em]frame.south)}]
      \mouse[shift={([yshift=-4ex,xshift=5em]frame.south)}]
    \end{scope}}}

\newtcolorbox{animal2}[1][]{%
  enhanced,
  before skip=30ex,after skip=10ex,
  colback=yellow,frame hidden,
  overlay={%
    \begin{scope}
      \clip (frame.north west) -- (frame.north east) -- ++(0,+10ex) -- ++(-\linewidth,0) -- cycle;
      \cat[shift={([yshift=-7ex]frame.north)},eye=green]
      % \bat[shift={([yshift=-7ex,xshift=-5em]frame.north)}]
      % \bee[shift={([yshift=-7ex,xshift=5em]frame.north)}]
    \end{scope}
    %
    \begin{scope}
      \clip (frame.south west) -- (frame.south east) -- ++(0,-10ex) -- ++(-\linewidth,0) -- cycle;
      \cat[shift={([yshift=-4ex]frame.south)}]
      % \bat[shift={([yshift=-4ex,xshift=-5em]frame.south)}]
      % \bee[shift={([yshift=-4ex,xshift=5em]frame.south)}]
    \end{scope}}}

\newtcolorbox{animal3}[1][]{%
  enhanced,
  before skip=30ex,after skip=10ex,
  colback=yellow,frame hidden,
  overlay={%
    \begin{scope}
      \clip (frame.north west) -- (frame.north east) -- ++(0,+10ex) -- ++(-\linewidth,0) -- cycle;
      \owl[shift={([yshift=-7ex]frame.north)},
       bill=pink,speech={Yes!},bubblecolour=gray!30!white]
      % \bat[shift={([yshift=-7ex,xshift=-5em]frame.north)}]
      % \bee[shift={([yshift=-7ex,xshift=5em]frame.north)}]
    \end{scope}
    %
    \begin{scope}
      \clip (frame.south west) -- (frame.south east) -- ++(0,-10ex) -- ++(-\linewidth,0) -- cycle;
      \owl[shift={([yshift=-4ex]frame.south)}]
      % \bat[shift={([yshift=-4ex,xshift=-5em]frame.south)}]
      % \bee[shift={([yshift=-4ex,xshift=5em]frame.south)}]
    \end{scope}}}

\newtcolorbox{animal4}[1][]{%
  enhanced,
  before skip=30ex,after skip=10ex,
  colback=yellow,frame hidden,
  overlay={%
    \begin{scope}
      \clip (frame.north west) -- (frame.north east) -- ++(0,+10ex) -- ++(-\linewidth,0) -- cycle;
      \snowman[shift={([yshift=-7ex]frame.north)},tophat]
      % \bat[shift={([yshift=-7ex,xshift=-5em]frame.north)}]
      % \bee[shift={([yshift=-7ex,xshift=5em]frame.north)}]
    \end{scope}
    %
    \begin{scope}
      \clip (frame.south west) -- (frame.south east) -- ++(0,-10ex) -- ++(-\linewidth,0) -- cycle;
      \snowman[shift={([yshift=-4ex]frame.south)}]
      % \bat[shift={([yshift=-4ex,xshift=-5em]frame.south)}]
      % \bee[shift={([yshift=-4ex,xshift=5em]frame.south)}]
    \end{scope}}}

\newtcolorbox{animal5}[1][]{%
  enhanced,
  before skip=30ex,after skip=10ex,
  colback=yellow,frame hidden,
  overlay={%
    \begin{scope}
      \clip (frame.north west) -- (frame.north east) -- ++(0,+10ex) -- ++(-\linewidth,0) -- cycle;
      \mouse[shift={([yshift=-7ex]frame.north)},santa=red!80!black]
      % \bat[shift={([yshift=-7ex,xshift=-5em]frame.north)}]
      % \bee[shift={([yshift=-7ex,xshift=5em]frame.north)}]
    \end{scope}
    %
    \begin{scope}
      \clip (frame.south west) -- (frame.south east) -- ++(0,-10ex) -- ++(-\linewidth,0) -- cycle;
      \mouse[shift={([yshift=-4ex]frame.south)}]
      % \bat[shift={([yshift=-4ex,xshift=-5em]frame.south)}]
      % \bee[shift={([yshift=-4ex,xshift=5em]frame.south)}]
    \end{scope}}}

\newtcolorbox{animal6}[1][]{%
  enhanced,
  before skip=30ex,after skip=10ex,
  colback=yellow,frame hidden,
  overlay={%
    \begin{scope}
      \clip (frame.north west) -- (frame.north east) -- ++(0,+10ex) -- ++(-\linewidth,0) -- cycle;
      \chicken[shift={([yshift=-7ex]frame.north)},comb=orange]
      \chicken[shift={([yshift=-4ex,xshift=-5em]frame.north)},baby=pink]
      \chicken[shift={([yshift=-4ex,xshift=5em]frame.north)},baby]
    \end{scope}
    %
    \begin{scope}
      \clip (frame.south west) -- (frame.south east) -- ++(0,-10ex) -- ++(-\linewidth,0) -- cycle;
      \chicken[shift={([yshift=-4ex]frame.south)}]
      \chicken[shift={([yshift=-4ex,xshift=-5em]frame.south)},baby=pink]
      \chicken[shift={([yshift=-4ex,xshift=5em]frame.south)},baby]
    \end{scope}}}
コンパイル例
コンパイルの例です。
モンスターボール フレームの紹介
はじめに
tcolorboxパッケージを用いて作成したモンスターボールフレームを紹介します。
とはいえ,ボール部分のコードは大昔に拾ったものを少しイジったものです。 現在はどうやら消されているようで,探しても見つかりませんでした。 問題があればすみません。許してください・・・。
フレームたち
自分が色付きで使わないので,すべて白黒にしています。
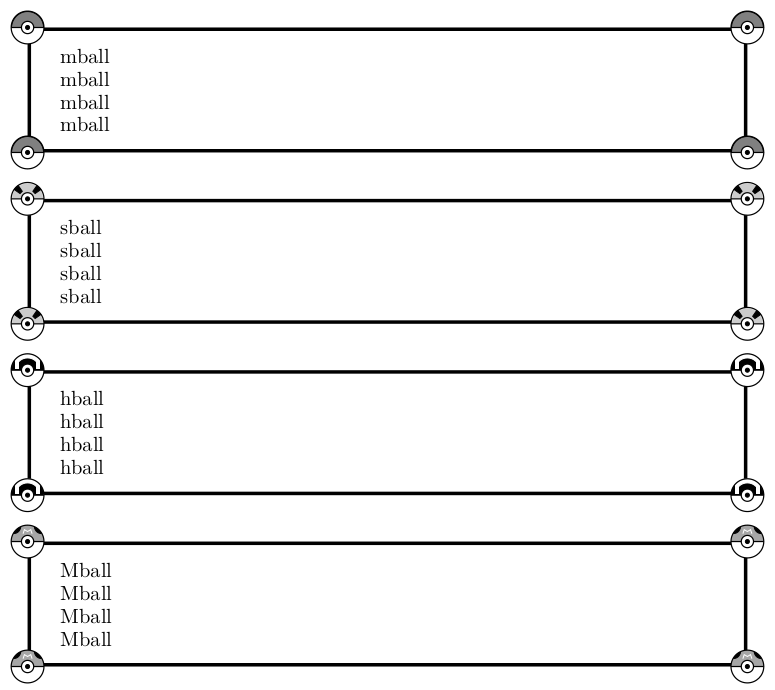
\begin{mball}
mball\\
mball\\
mball\\
mball
\end{mball}

\begin{sball}
sball\\
sball\\
sball\\
sball
\end{sball}

\begin{hball}
hball\\
hball\\
hball\\
hball
\end{hball}

\begin{Mball}
Mball\\
Mball\\
Mball\\
Mball
\end{Mball}
プリアンブルでの記述
長いので,別ファイルにして管理するのがいいと思います。
\newtcolorbox{mball}{%
  enhanced,colback=white,colframe=black,boxrule=0.6mm,enlarge top by=3.5mm,enlarge bottom by=2.0mm,overlay={%
\foreach \n in {north east,north west,south east,south west}{%
  \begin{scope}[scale=1.0,rotate=0,shift=(frame.\n)]
    \filldraw[gray,draw=black](1:7.8pt)arc(1:179:7.8pt)--cycle;
    \filldraw[white,draw=white](-1:7.8pt)arc(-1:-179:7.8pt)--cycle;
    \draw[line width=0.6pt,black](0,0)circle[radius=8pt];
    \draw[line width=0.6pt,black](180:8pt)--(0:8pt);
    \filldraw[line width=0.6pt,white,draw=black](0,0)circle[radius=3pt];
    \filldraw[line width=0.1pt,black,draw=black](0,0)circle[radius=1.0pt];
  \end{scope}}
}}

\newtcolorbox{sball}{%
  enhanced,colback=white,colframe=black,boxrule=0.6mm,enlarge top by=3.5mm,enlarge bottom by=2.0mm,overlay={%
\foreach \n in {north east,north west,south east,south west}{
  \begin{scope}[scale=1.0,rotate=0,shift=(frame.\n)]
    \filldraw[gray!40,draw=white](1:7.8pt)arc(1:179:7.8pt)--cycle;;
    \filldraw[white,draw=white](-1:7.8pt)arc(-1:-179:7.8pt)--cycle;
    \filldraw[black](35:4.5pt)--(55:4.5pt)--(55:7.9pt)arc(55:35:7.9pt)--cycle;
    \filldraw[black](145:4.5pt)--(125:4.5pt)--(125:7.9pt)arc(125:145:7.9pt)--cycle;
    \draw[line width=0.6pt,black](0,0)circle[radius=8pt];
    \draw[line width=0.6pt,black](180:8pt)--(0:8pt);
    \filldraw[line width=0.6pt,white,draw=black](0,0)circle[radius=3pt];
    \filldraw[line width=0.1pt,black,draw=black](0,0)circle[radius=1.0pt];
  \end{scope}}
}}

\newtcolorbox{hball}{%
  enhanced,colback=white,colframe=black,boxrule=0.6mm,enlarge top by=3.5mm,enlarge bottom by=2.0mm,overlay={
\foreach \n in {north east,north west,south east,south west}{
  \begin{scope}[scale=1.0,rotate=0,shift=(frame.\n)]
    \filldraw[black](1:7.8pt)arc(1:179:7.8pt)--cycle;;
    \filldraw[white,draw=white](-1:7.8pt)arc(-1:-179:7.8pt)--cycle;
    \filldraw[white](-6.0pt,0.6pt)rectangle(-4.4pt,5.2pt);
    \filldraw[white](6.0pt,0.6pt)rectangle(4.4pt,5.2pt);
    \filldraw[white](135:6pt)arc(135:45:6pt)--(45:7.9pt)arc(45:135:7.9pt)--cycle;
    \draw[line width=0.6pt,black](0,0)circle[radius=8pt];
    \draw[line width=0.6pt,black](180:8pt)--(0:8pt);
    \filldraw[line width=0.6pt,white,draw=black](0,0)circle[radius=3pt];
    \filldraw[line width=0.1pt,black,draw=black](0,0)circle[radius=1.0pt];
  \end{scope}}
}}

\newtcolorbox{Mball}{%
  enhanced,colback=white,colframe=black,boxrule=0.6mm,enlarge top by=3.5mm,enlarge bottom by=2.0mm,overlay={%
\foreach \n in {north east,north west,south east,south west}{
  \begin{scope}[scale=1.0,rotate=0,shift=(frame.\n)]
  \filldraw[gray!70,draw=gray!70](1:7.8pt)arc(1:179:7.8pt)--cycle;;
  \filldraw[white,draw=white](-1:7.8pt)arc(-1:-179:7.8pt)--cycle;
  \draw[white,line width=0.6pt*0.8](120:4.4pt)--(105:6.0pt)--(90:4.9pt)--(75:6.0pt)--(60:4.4pt);
  \filldraw[black](115:7.8pt)to[out=-100,in=0](150:7.8pt)arc(150:115:7.8pt);
  \filldraw[black](65:7.8pt)to[out=-80,in=180](30:7.8pt)arc(30:65:7.8pt);
  \draw[line width=0.6pt,black](0,0)circle[radius=8pt];
  \draw[line width=0.6pt,black](180:8pt)--(0:8pt);
  \filldraw[line width=0.6pt,white,draw=black](0,0)circle[radius=3pt];
  \filldraw[line width=0.1pt,black,draw=black](0,0)circle[radius=1.0pt];
  \end{scope}}
}}
コンパイル例
コンパイルの例です。 www.overleaf.com
tcolorboxで作るフレームの紹介
はじめに
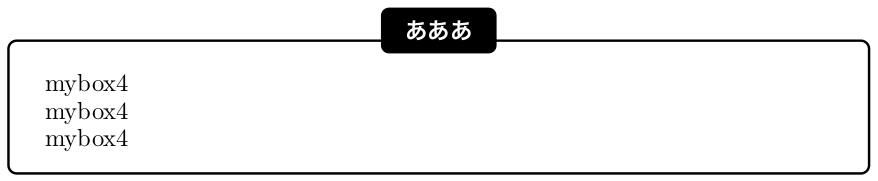
tcolorboxパッケージを用いて作成したフレームを紹介します。
自分がよく使うものも,まったく使わないものも入っています。 フレームは,一部分をどこかから拾ってきたものや,パッケージのマニュアルそのままのもの,イチから作ったもの,と色々です。
フレームたち
自分が色付きで使わないので,すべて白黒です。
\begin{mybox}
 mybox\\
 mybox\\
 mybox
\end{mybox}

\begin{mybox2}{あああ}
 mybox2\\
 mybox2\\
 mybox2
\end{mybox2}

\begin{mybox3}{あああ}
 mybox3\\
 mybox3\\
 mybox3
\end{mybox3}

\begin{mybox4}{あああ}
 mybox4\\
 mybox4\\
 mybox4
\end{mybox4}
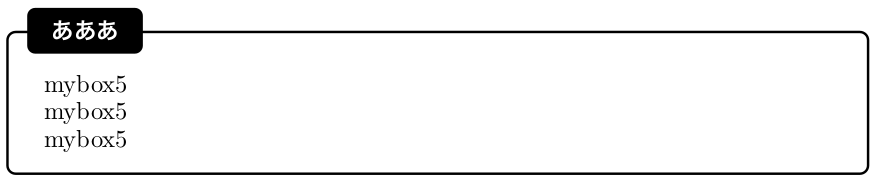
\begin{mybox5}{あああ}
 mybox5\\
 mybox5\\
 mybox5
\end{mybox5}
\begin{mybox7}
 mybox7\\
 mybox7\\
 mybox7
\end{mybox7}

\begin{mybox8}{ああああ}
 mybox8\\
 mybox8\\
 mybox8\\
 mybox8
\end{mybox8}

\begin{marker}
marker\\
marker\\
marker
\end{marker}

\begin{mycross}
mycross\\
mycross\\
mycross
\end{mycross}

\begin{frog}
frog\\
frog\\
frog
\end{frog}

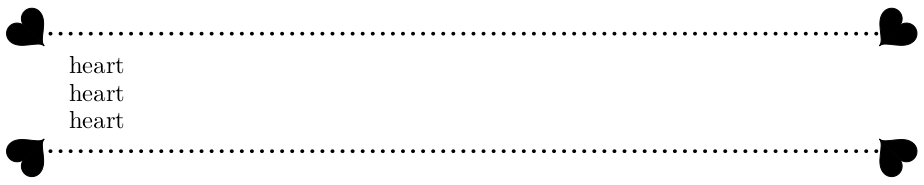
\begin{heart}
heart\\
heart\\
heart
\end{heart}
\begin{edgeball}
 edgeball\\
 edgeball\\
 edgeball
\end{edgeball}

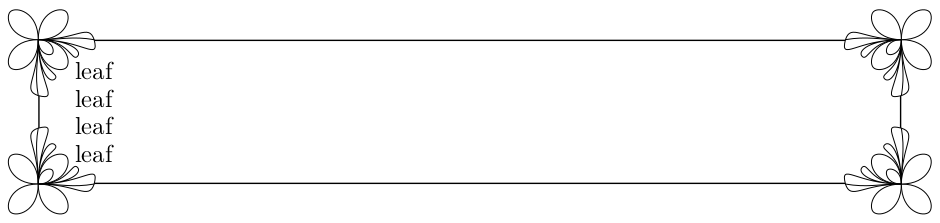
\begin{leaf}
leaf\\
leaf\\
leaf\\
leaf
\end{leaf}
\begin{flower}
flower\\
flower\\
flower\\
flower
\end{flower}

プリアンブルでの記述
長いので,別ファイルにして管理するのがいいと思います。
% ビックリ枠
% マニュアルの枠
\newtcolorbox{marker}[1][]{%
  enhanced,before skip=2mm,after skip=3mm,
  boxrule=0.4pt,left=5mm,right=2mm,top=1mm,bottom=1mm,
  colback=white!50,colframe=white!20!black,
  sharp corners,rounded corners=southeast,arc is angular,arc=3mm,
  underlay={%
    \path[fill=black] ([yshift=3mm]interior.south east)--++(-0.4,-0.1)--++(0.1,-0.2);
    \path[draw=black,shorten <=-0.05mm,shorten >=-0.05mm] ([yshift=3mm]interior.south east)--++(-0.4,-0.1)--++(0.1,-0.2);
    \path[fill=black,draw=none] (interior.south west) rectangle node[white]{\Huge\bfseries !} ([xshift=4mm]interior.north west);
    },
  drop fuzzy shadow,#1}

% バッテン
\newtcolorbox{mycross}{enhanced,colback=white,colframe=white,left=4em,right=4em,
  interior code={
    \path[dotted,draw=black,line width=0.5mm]%line cap=round
     ([xshift=3mm,yshift=-3mm]interior.north west)
     --([xshift=-3mm,yshift=3mm]interior.south east)
     ([xshift=3mm,yshift=3mm]interior.south west)
     --([xshift=-3mm,yshift=-3mm]interior.north east);}}

%% カエル
\newtcolorbox{frog}{enhanced,colback=white,colframe=black!65!black,boxrule=1mm,enlarge top by=5.5mm,overlay={\foreach \x in {2cm,3.5cm}{
\begin{scope}[shift={([xshift=\x]frame.north west)}]
  \path[draw=black,fill=white,line width=1mm] (0,0) arc (0:180:5mm);
  \path[fill=black] (-0.2,0) arc (0:180:1mm);
\end{scope}}}}

% 2つのフレームで使用
\newcommand{\edgeleaf}{%
    \foreach ~ in {0,90,180,270}
      \draw[fill=white,rotate=~] (0,0) .. controls +(-.5,0) and +(-.1,-.1) .. (-.5,.5) .. controls +(.1,.1) and +(0,.5) .. (0,0);
    \foreach ~ in {1,-1}
      \draw[fill=white,yscale=~,rotate=45-~*45]
        (0,0) .. controls +(0,.55) and +(-.1,-.1) .. (-.3,.7) .. controls +(.1,.1) and +(0,.55) .. (0,0)
        (0,0) .. controls +(0,.8) and +(-.4,.1) .. (0,1) .. controls +(.3,-.1) and +(0,.7) .. (0,0);
    \draw[black]
      (0,0) to[relative,in=190,out=0] (0,1)
      (0,0) to[relative,in=170,out=0] (-1,0);
    \draw[black,scale=.5] (0,0) .. controls +(-.5,0) and +(-.1,-.1) .. (-.5,.5) .. controls +(.1,.1) and +(0,.5) .. (0,0);
}

%% leaf
\newtcolorbox{leaf}{enhanced,colback=white,colframe=black,boxrule=0.2mm,enlarge top by=5.5mm,enlarge bottom by=5.0mm,overlay={
% enlarge top by でフレーム前後の余白の調節
\begin{scope}[scale=0.8,rotate=180,shift=(frame.north west)]
\edgeleaf
\end{scope}
%
\begin{scope}[scale=0.8,rotate=-90,shift=(frame.south west)]
\edgeleaf
\end{scope}
%
\begin{scope}[scale=0.8,rotate=0,shift=(frame.south east)]
\edgeleaf
\end{scope}
%
\begin{scope}[scale=0.8,rotate=90,shift=(frame.north east)]
\edgeleaf
\end{scope}
}}

% flower
\newtcolorbox{flower}{enhanced,colback=white,colframe=black,boxrule=0.6mm,enlarge top by=5.5mm,enlarge bottom by=2.0mm,top=15pt,bottom=15pt,
overlay={
% enlarge top by でフレーム前後の余白の調節
%
% 小さい花たち
\foreach \x in {-2.2\linewidth,-2.0\linewidth,...,2.2\linewidth}{%
\begin{scope}[scale=0.2,rotate=0,shift={([xshift=\x,yshift=-1.5mm]frame.north)}]% xshift,yshift: 花の場所
  \foreach \a in {0,60,...,350}{%
    \draw[fill=white, draw=black,rotate=\a+30 + \x/10]% <- \x/10 で回転させる
      (0.8,0) ellipse(0.6 and 0.4);
    }
\end{scope}
}
\foreach \x in {-2.2\linewidth,-2.0\linewidth,...,2.2\linewidth}{%
\begin{scope}[scale=0.2,rotate=0,shift={([xshift=\x,yshift=1.5mm]frame.south)}]
  \foreach \a in {0,60,...,350}{%
    \draw[fill=white, draw=black,rotate=\a+30 + \x/10]% <- \x/10 で回転させる
      (0.8,0) ellipse(0.6 and 0.4);
    }
\end{scope}
}
\begin{scope}[scale=0.8,rotate=180,shift=(frame.north west)]
  \edgeleaf
\end{scope}
%
\begin{scope}[scale=0.8,rotate=-90,shift=(frame.south west)]
  \edgeleaf
\end{scope}
%
\begin{scope}[scale=0.8,rotate=0,shift=(frame.south east)]
  \edgeleaf
\end{scope}
%
\begin{scope}[scale=0.8,rotate=90,shift=(frame.north east)]
  \edgeleaf
\end{scope}
}}

% ハート
\newtcolorbox{heart}{enhanced,
colback=white,frame hidden,
enlarge top by=5.5mm,enlarge bottom by=5.0mm,
borderline north={0.5mm}{0mm}{black,dash pattern=on 0.1pt off 4pt,line width=1.5pt,line cap=round},
borderline south={0.5mm}{0mm}{black,dash pattern=on 0.1pt off 4pt,line width=1.5pt,line cap=round},
overlay={%
% enlarge top by でフレーム前後の余白の調節
\newcommand{\edgeheart}{%
\begin{scope}[xscale=1,yscale=1]% heartの形の調節
  \draw[black,fill=black] (0,0) .. controls (0,0.6) and (-1.5,1.00) .. (-1.5,2)  arc (180:0:0.75)  -- cycle;
  \draw[black,fill=black] (0,0) .. controls (0,0.6) and ( 1.5,1.00) .. ( 1.5,2)  arc (0:180:0.75) -- cycle;
\end{scope}
}
\begin{scope}[scale=0.2,shift={([xshift=10mm,yshift=-10mm]frame.north west)},rotate=45]
  \edgeheart
\end{scope}
%
\begin{scope}[scale=0.2,shift={([xshift=10mm,yshift=10mm]frame.south west)},rotate=135]
  \edgeheart
\end{scope}
%
\begin{scope}[scale=0.2,shift={([xshift=-10mm,yshift=10mm]frame.south east)},rotate=-135]
  \edgeheart
\end{scope}
%
\begin{scope}[scale=0.2,shift={([xshift=-10mm,yshift=-10mm]frame.north east)},rotate=-45]
  \edgeheart
\end{scope}
}}

% 角にボール
\newtcolorbox{edgeball}{%
  breakable,enhanced,colback=white,colframe=black,boxrule=1.0pt,leftupper=0.5em,rightupper=0.5em,enlarge top by=2.5mm,enlarge bottom by=2.0mm,
  frame code={%
  \foreach \n in {north east,north west,south east,south west}
  {\path [fill=black] (interior.\n) circle (3mm); }; }}

% フツーの枠
\newtcolorbox{mybox}{%
  breakable,enhanced,colback=white,colframe=black,left=0.5em,right=0.5em,boxrule=1.0pt}

\newtcolorbox{mybox2}[1]{%
  breakable,enhanced,colback=white,colframe=black,fonttitle=\bfseries,title=#1,leftupper=0.5em,rightupper=0.5em,boxrule=1.0pt}

\newtcolorbox{mybox3}[1]{%
  breakable,enhanced,colbacktitle=white,coltitle=black,colback=white,colframe=black,sharp corners,fonttitle=\bfseries,title=#1,leftupper=0.5em,rightupper=0.5em,boxrule=1.0pt}

\newtcolorbox{mybox4}[1]{%
  breakable,enhanced,colback=white,colframe=black,fonttitle=\bfseries,colbacktitle=black,attach boxed title to top center={yshift*=-2mm},title=#1,boxrule=1.0pt}

% enlarge top by: 箱の頭と記述の距離
\newtcolorbox{mybox5}[1]{%
  breakable,enhanced,enlarge top by=0mm,colback=white,colframe=black,fonttitle=\bfseries,colbacktitle=black,attach boxed title to top left={xshift=3mm,yshift*=-\tcboxedtitleheight/2},title=#1,boxrule=1.0pt}

%% manual p.152
\newtcolorbox{mybox7}{%
  breakable,enhanced,arc=3mm,colback=white,frame hidden,left=0.5em,right=0.5em,borderline={1.0pt}{0pt}{black,dotted}
}

\newtcolorbox{mybox8}[1]{%
  enhanced,title=#1,
  fonttitle=\sffamily\bfseries,top=2pt,bottom=2pt,boxrule=6pt,arc=0pt,
  colframe=white,coltitle=white,colback=white,
  attach boxed title to top left={yshift=-2pt,xshift=-1pt},
  borderline north={0.5mm}{0mm}{%
    black,dash pattern=on 0.1pt off 4pt,line width=2pt,line cap=round},
  borderline south={0.5mm}{0mm}{%
    black,dash pattern=on 0.1pt off 4pt,line width=2pt,line cap=round},
  boxed title style={
    colback=black,colframe=black,sharp corners,
    rounded corners=northeast,arc=3mm,boxrule=0pt}
}
コンパイル例
コンパイルの例です。 www.overleaf.com
解答欄を描くパッケージ(answerbox.sty)
追記
- 2018/01/24 ver1.0.0 を公開しました。
- 2022/01/27 ver1.5.0 を公開しました。
- 2024/03/28 ver1.7.0 を公開しました。
はじめに
2018年に公開したパッケージを,自分で使いながら少しずつ改善してきました。 まとまった時間ができ次第,細々と更新していきたいと思います。
過去のものとはコマンド名や文法が変わっているので,そのままコンパイルが通らない場合があります。
このパッケージの作成者は素人なので、お手柔らかにお願いします(震)。
パッケージの説明
LaTeXで,数学の試験における解答欄を単純な記述で描きたいと考え作成したのがこのパッケージです 。 もちろん,細かい設定をしようとすると記述は長くなります。
具体例
たとえば,以下のような記述で解答欄がつくれます。
\begin{ansbox}
  \pbox{5}
  \pbox{3}
\end{ansbox}

1行に何個の箱を置くかを指定できます。
\begin{ansbox}
  \pbox[4]{6}
\end{ansbox}

大問番号を消すことができます(小問も消せます)。
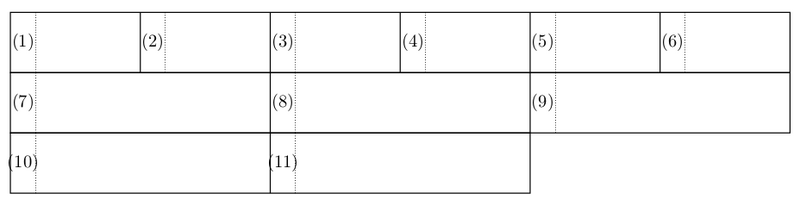
\begin{ansbox*}
  \pbox{6}
  \pbox[3]{5}
\end{ansbox*}
小問番号の形式を変えられます。
\begin{ansbox}[Schar=い]
  \pbox[6]{10}
  \pbox{4}
\end{ansbox}

枠の太さを変えられます。
\begin{ansbox}[thickness=7]
  \pbox{6}
  \pbox[3]{5}
\end{ansbox}

解答欄の中に書き込むことができます。
\begin{ansbox}
    \pbox{5}
  \ptxt{1}{c}{AAA}
  \ptxt{3}{r}{BBB}
  \ptxt{5}{l}{CCC}
\end{ansbox}

記述は省略(マニュアルを見てください)しますが,図版の挿入もできます。

マークシートをつくることができます。
\begin{ansbox}[height=8mm,Schar=ア]
  \pbox[1]{5}
  \ptxt{1}{l}{\markeggs}
  \ptxt{2}{l}{\markeggs}
  \ptxt{3}{l}{\markeggs}
  \ptxt{4}{l}{\markeggs}
  \ptxt{5}{l}{\markeggs}
\end{ansbox}
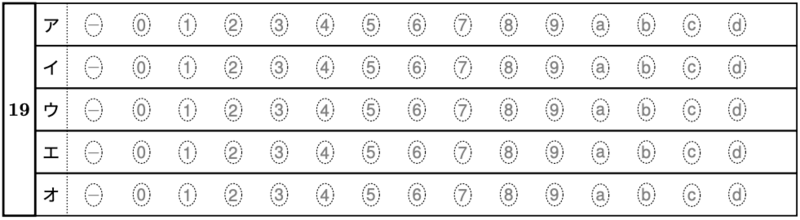
作成例
.styと説明書
以下に.styと説明書を置いておきます。 詳しい使い方や細かい設定はpdfに書いています。pdfを眺めれば使い方には困らないでしょう。
コメントアウトを外してください
ver1.7.0 では,エンジンに合わせて.styのコメントアウトを外してください。
- pLaTeX の場合
\RequirePackage[deluxe]{otf}
- upLaTeX の場合
\RequirePackage[uplatex,deluxe]{otf}
- LuaLaTeX の場合
\RequirePackage[deluxe]{luatexja-preset}
\RequirePackage{luatexja-otf}
過去のstyと説明書
lattepanda購入記録
価格とか
dfrobot.comにてlattepnadaとそのケースを購入しました.2月4日にポチって届いたのが2月21日です.
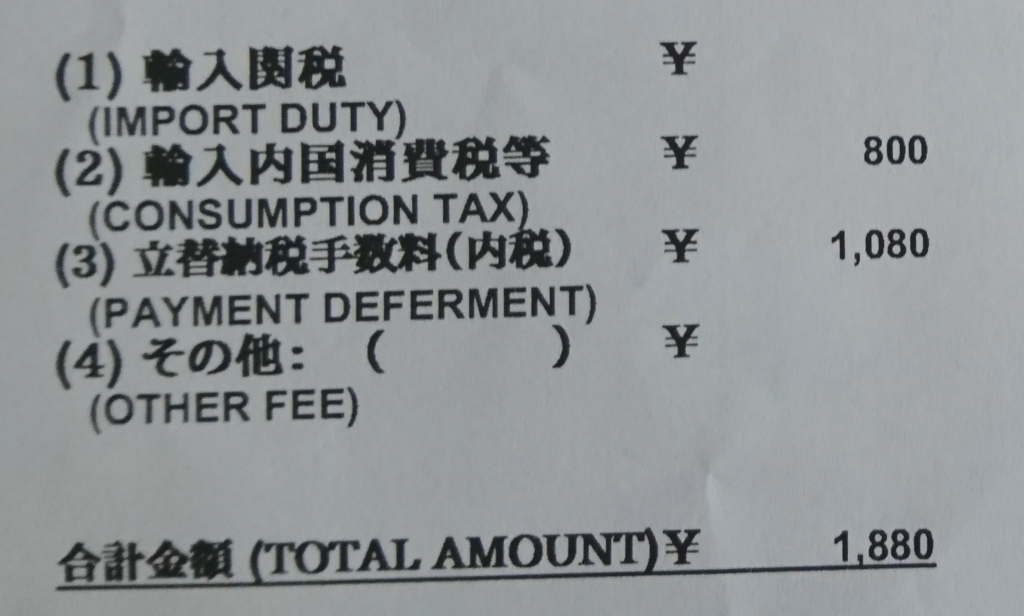
商品が¥21,670(= $188.80 USD)で税金が¥1880の合計¥23550でした.
ちなみにamazon.co.jpでは¥24355です.安い買い物ではないし届くまでの日数や保証を考えると,素直にamazonで購入が賢いと感じました.


写真とか
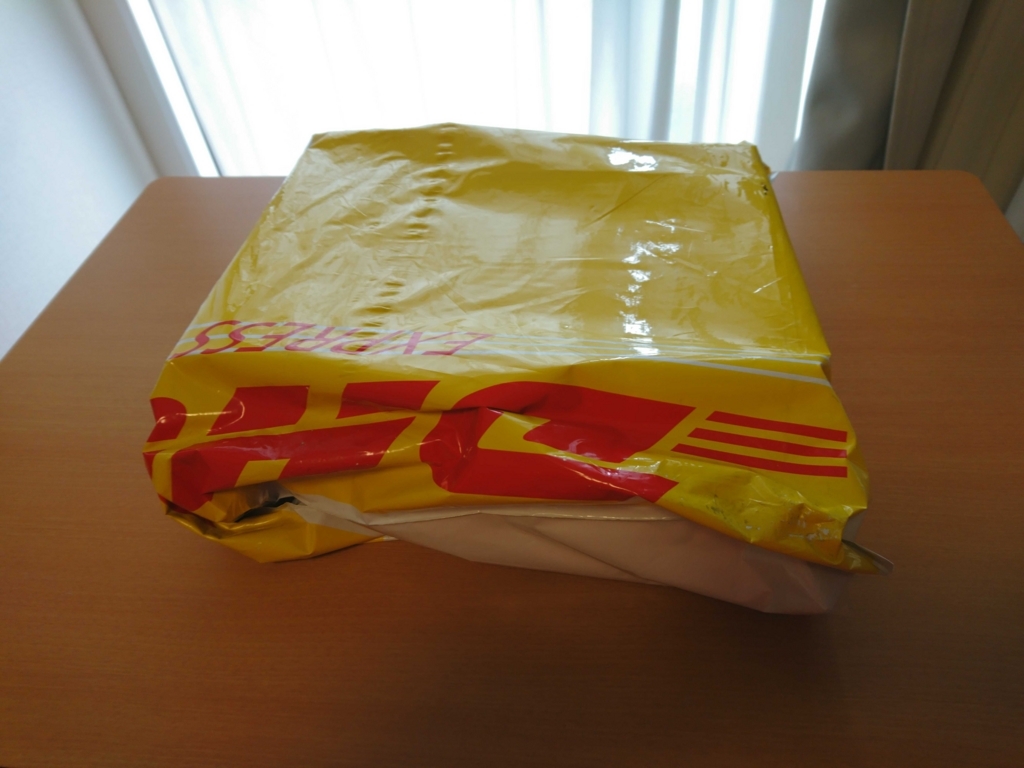
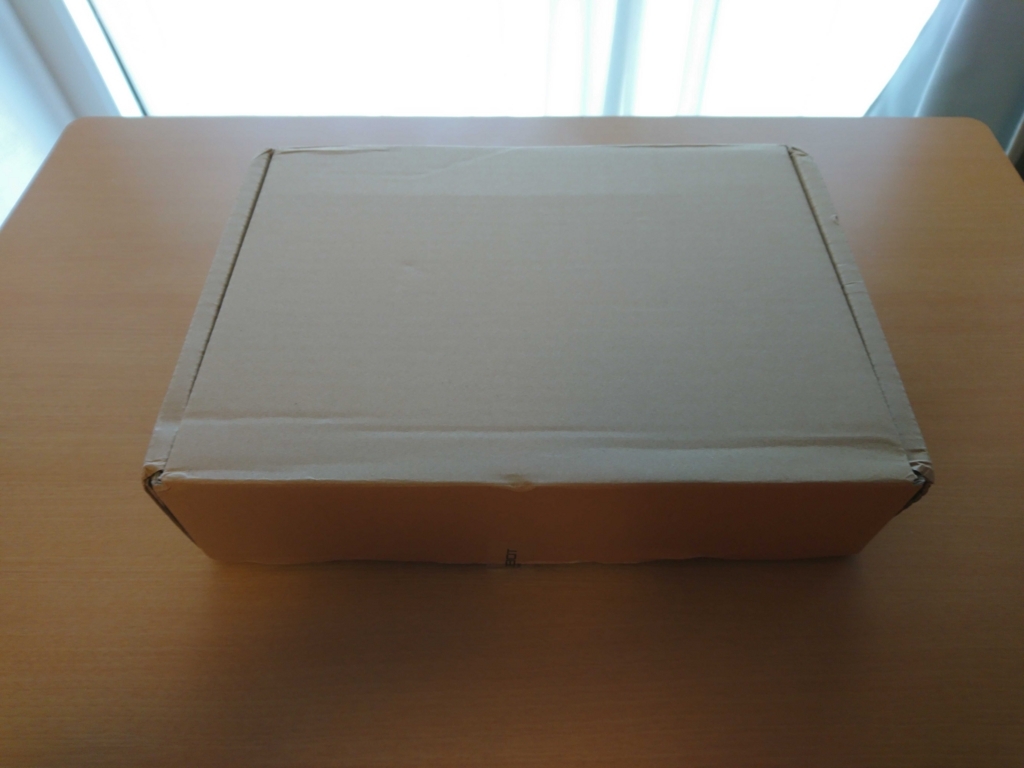
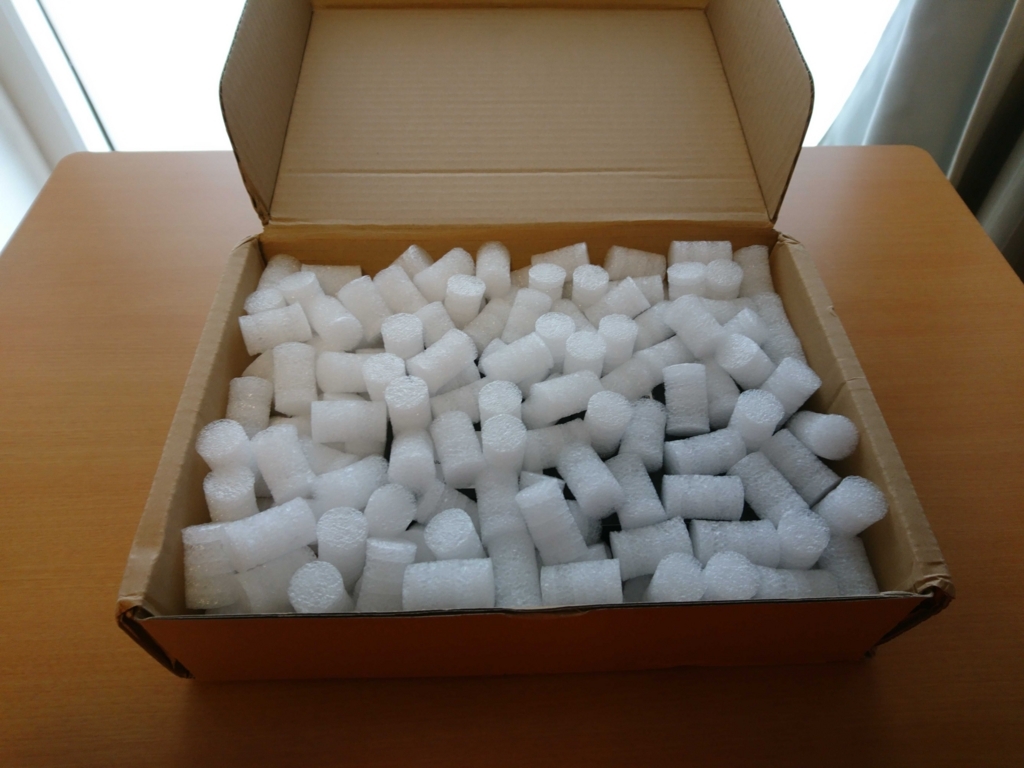
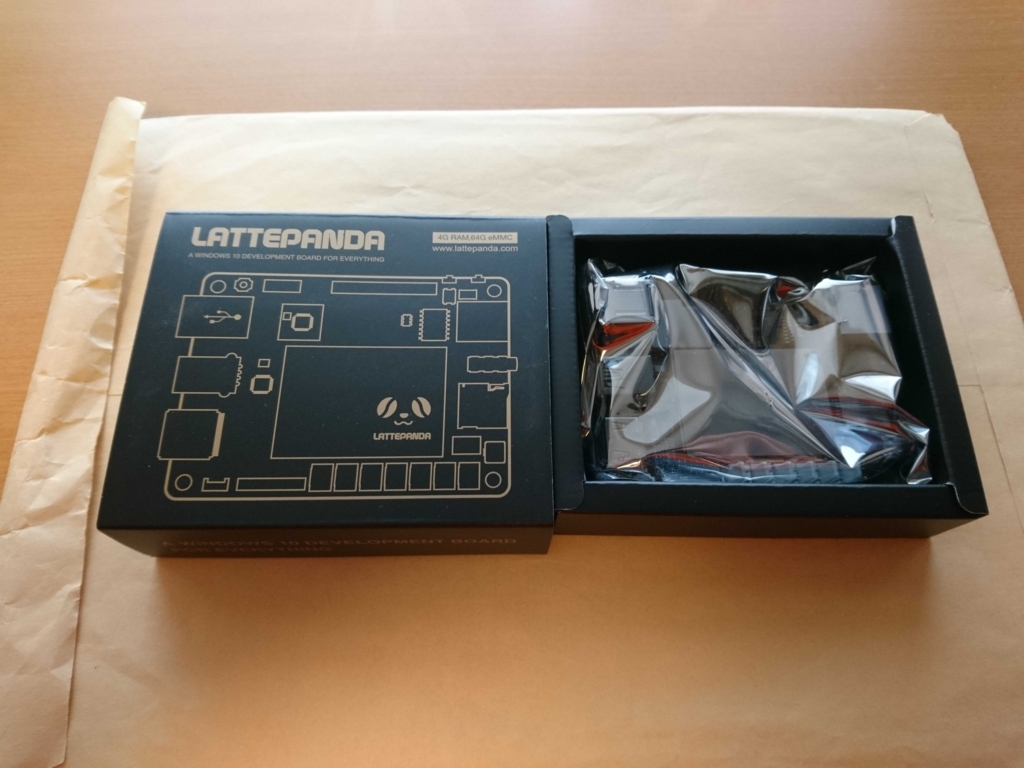
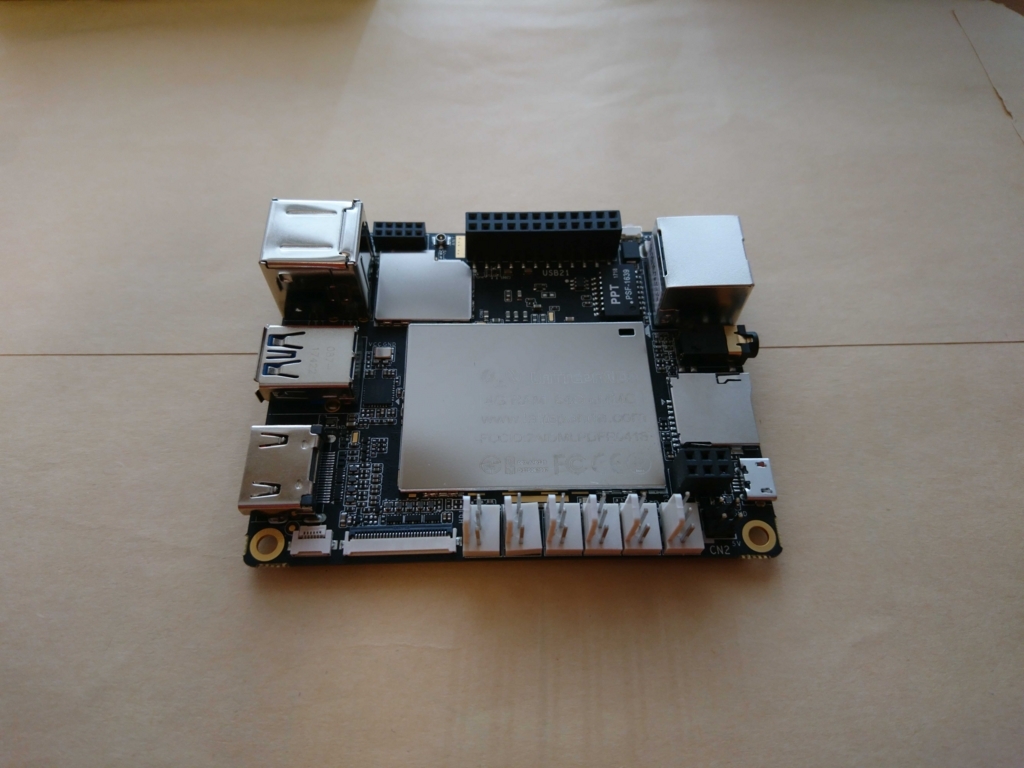
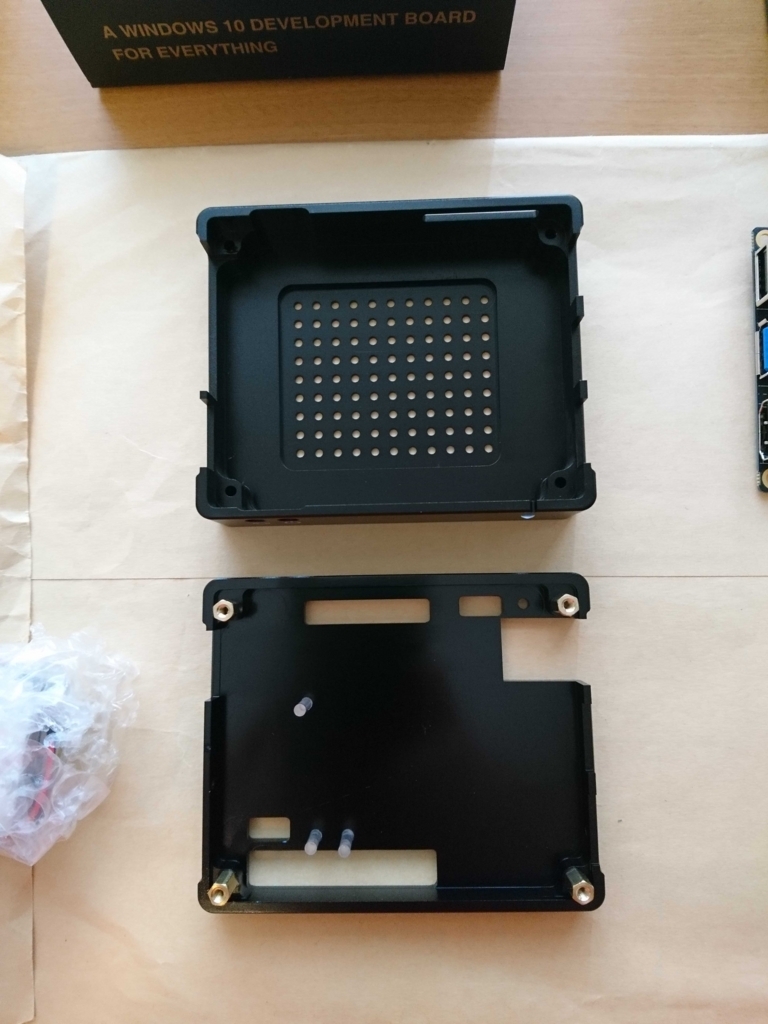
ケースは,緩衝材もなく2つ重なって箱の中に入っているのですが,キズ等なかったです.
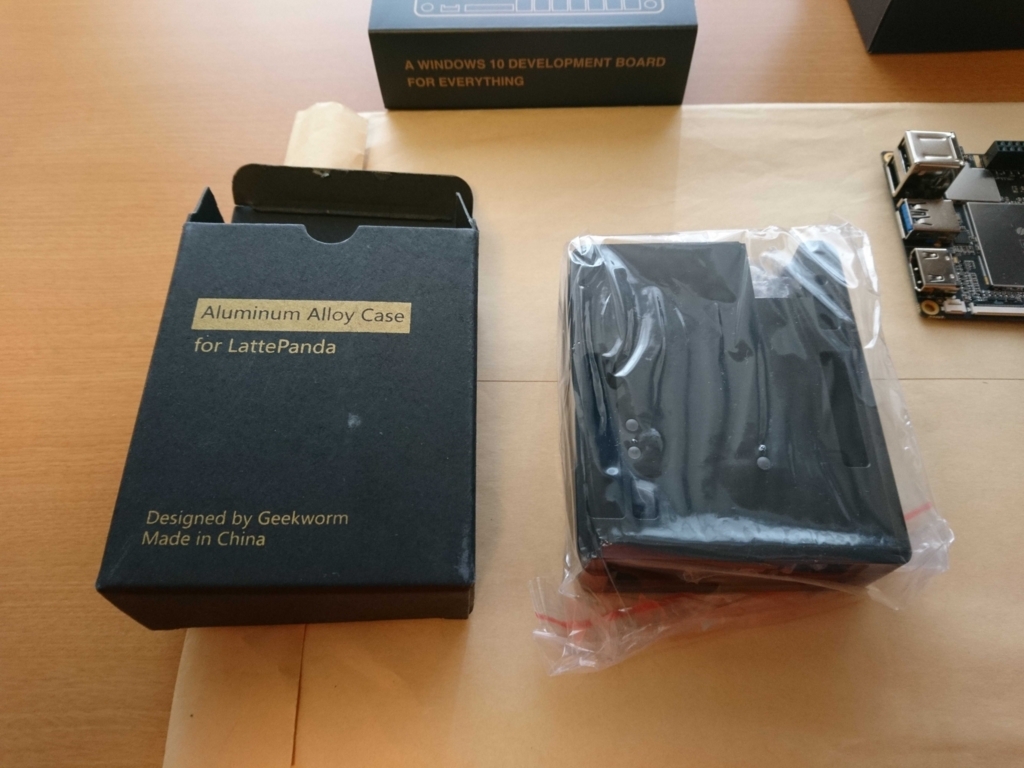
思ったよりケースの質感よかったです.
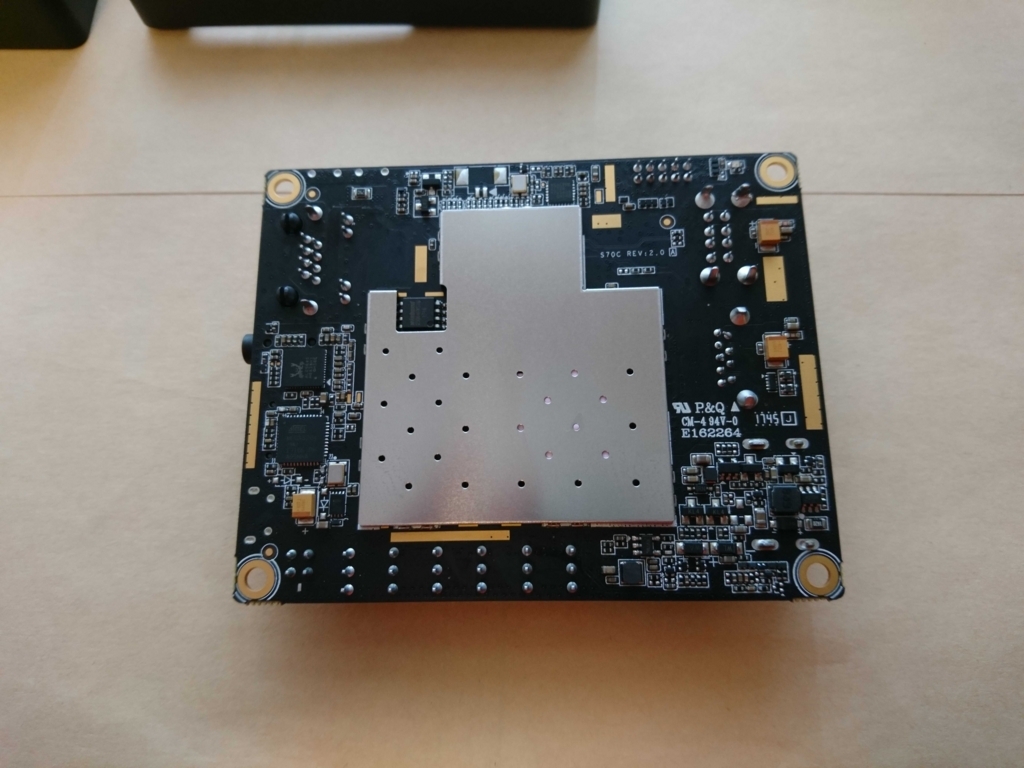
ファンです.
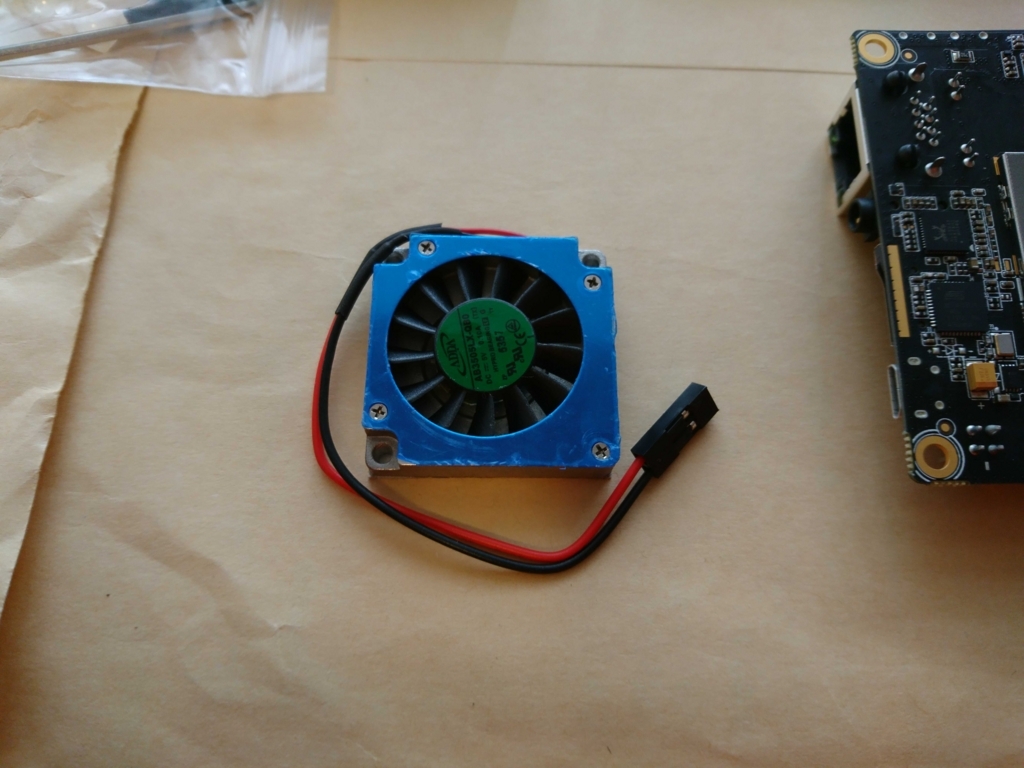
両面テープで張り付けて固定します.
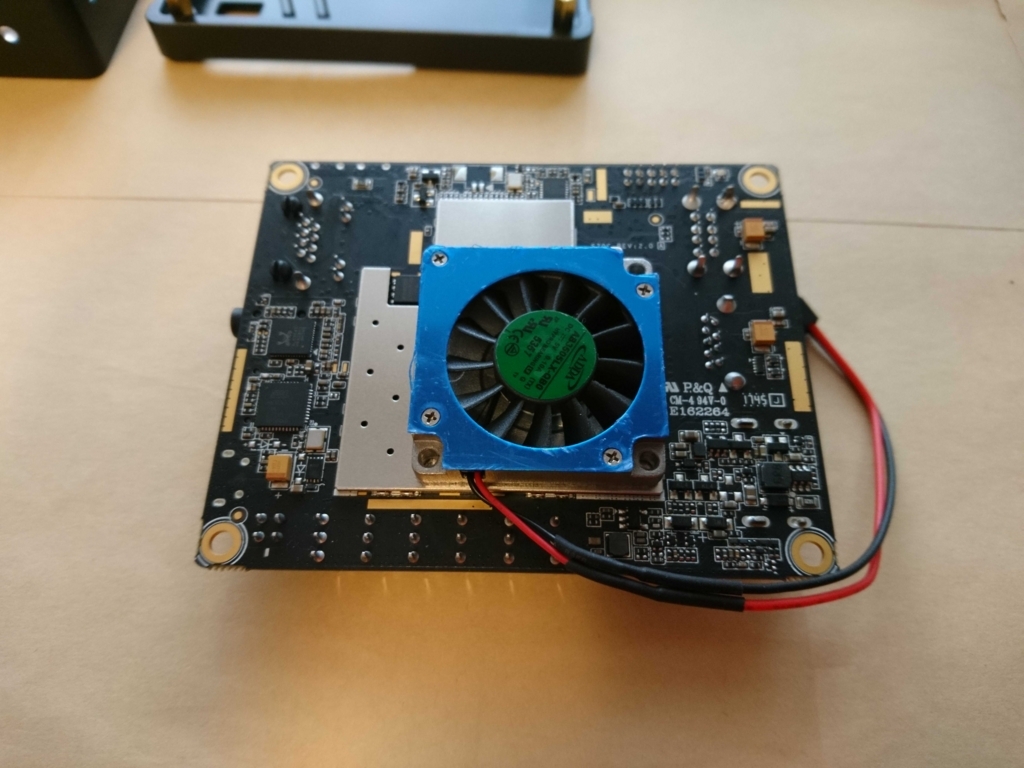
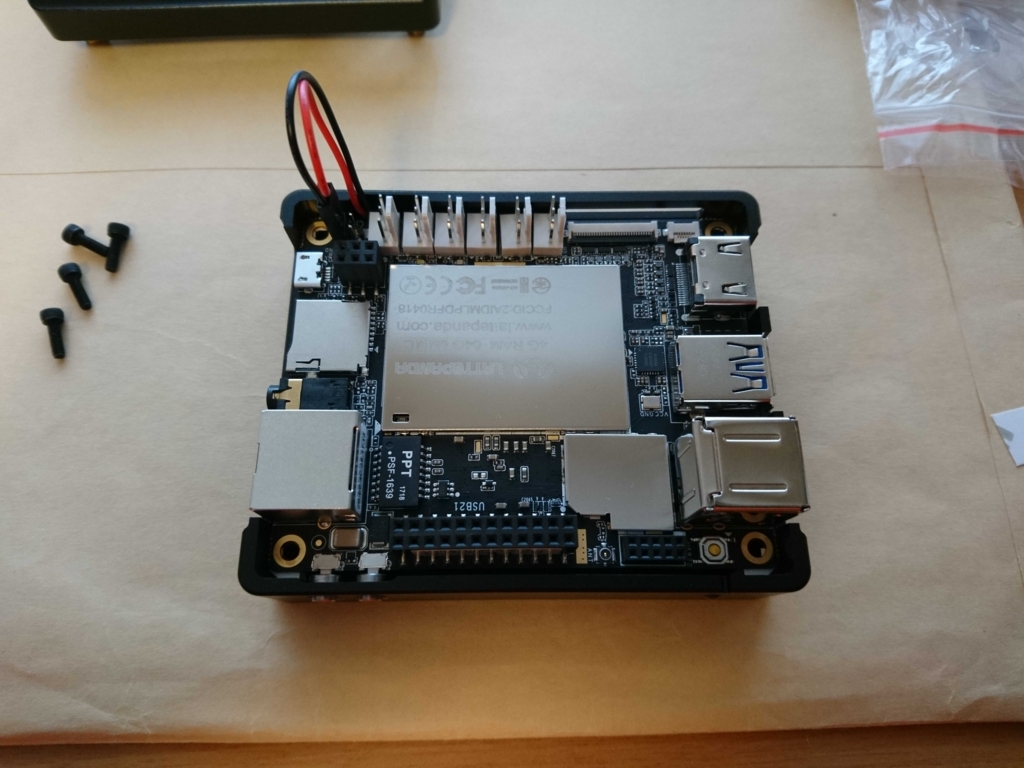
ケースに収めたところ.
トラブル
リセットボタンが常に押された状態になってしまいます.
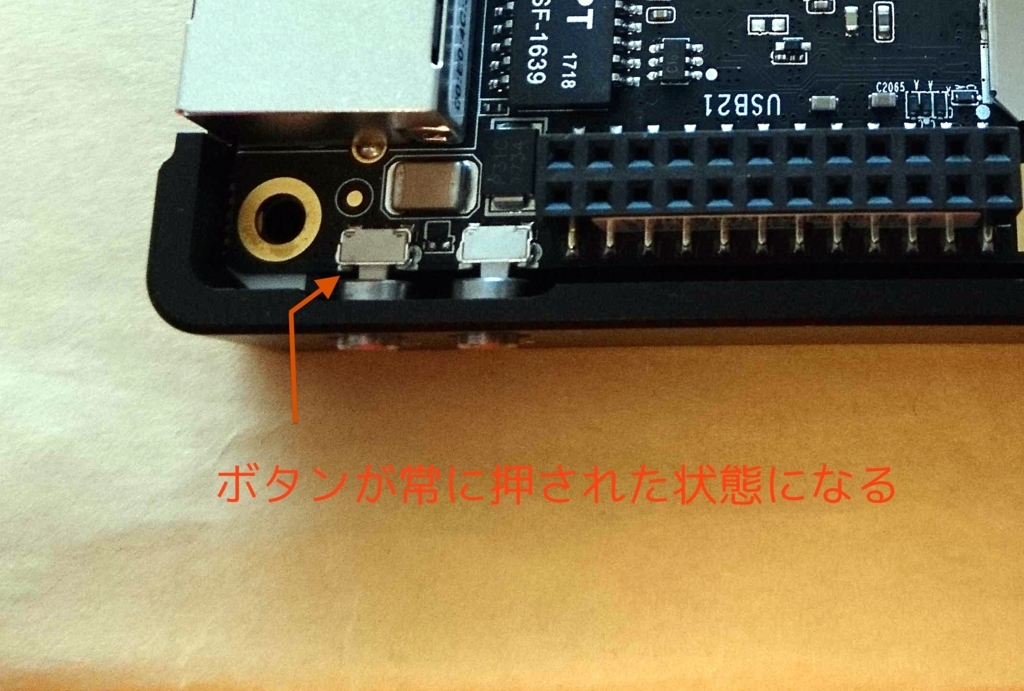
なのでボタンをヤスリで削ることにしました.
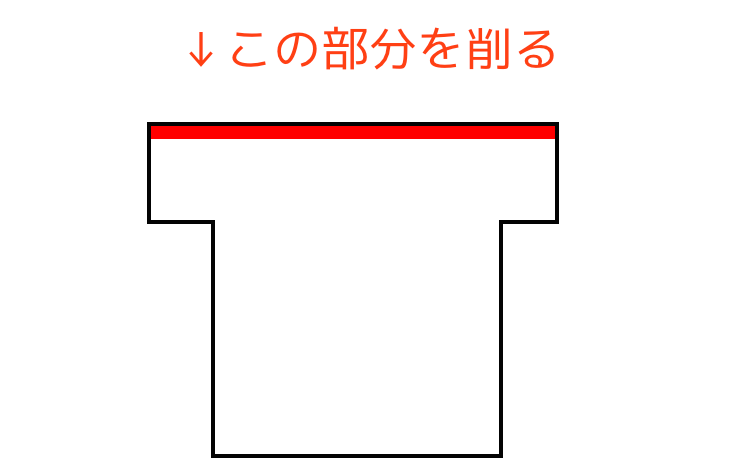
家に転がってた1200番の耐水ペーパーで数分間削ったところ,問題なくボタンをクリックできるようになりました!ω